
14 July, 2026

· 0 comments
Wipe-outs, bottom-turns, cutbacks… You’ve probably heard these terms more than once in the surfing world, but you might still struggle to know their exact definition.
Don’t worry! You’re not the only one who has ever been confused by so much surfer jargon.
In this article, we’re going to unveil the main maneuvers and basic movements taught in surf lessons, and this time you’ll be able to see the exact movements with examples from Pablo Fernández, the head instructor at Calima Surf School in Famara, so you can see exactly what we mean with each of them.
You’ve probably heard the term “wipe-out” in the surfing world, but attention! It’s not a maneuver as such, but rather a movement taught in surf courses.
This refers to falling into the water from the crest of the wave, something inevitable that we all have to go through, whether you have a very high level of surfing and lots of experience or you’re a beginner. The way you fall is super important and of course, deserves special attention.
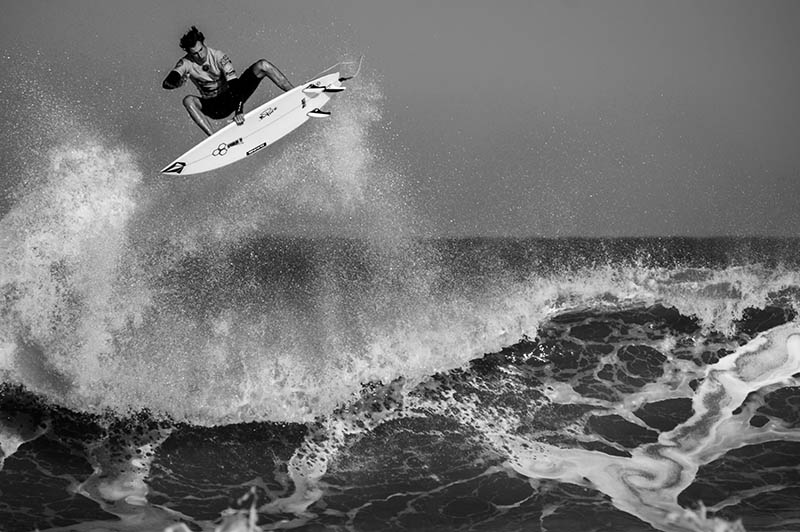
An extra tip! One of the most dangerous falls is when the tip of the board digs into the water. Why? Because this movement can cause a rebound effect, similar to a spring, where the board submerges and then shoots up into the air. This is especially dangerous because the board can fall in any direction, and if you’re underwater, you could easily take the hit.
To minimize the risk of injuries during a wipe-out, it’s crucial to learn how to protect yourself. Taking surf lessons beforehand is always advisable.
We advise you to always protect your head by placing one hand on the back of your neck and the other on top of your head, with your elbows forward. This way, you’ll protect your face and the most important parts of your head.
We also recommend that you avoid sudden falls. When finishing a wave, try to crouch slightly and hold onto the edges of the board with your hands. Lower yourself slowly and avoid jumping abruptly.
Learning to fall correctly is essential to prevent serious injuries, such as breaking the board, taking hard hits, or running out of breath underwater. That’s why mastering the wipe-out is an essential skill for any surfer.
Here’s a demonstration of an advanced wipe-out technique with just one jump. Video by Pablo, head instructor at our surf school in Lanzarote.
However, in upcoming articles, we’ll detail this for more levels.
Now you’ll probably hear many times about how to perform a proper Take Off. You know that in English this word has several meanings, for example: to take off, in aviation, to leave or go quickly, but in the context of surfing, take off refers to the act of getting up on the board at the right moment.
This is probably one of the most challenging maneuvers in the process of learning to surf for a beginner, so it is recommended to practice it thoroughly on the sand before putting it into practice in the sea.
Furthermore, it is advisable to explore the different styles for performing a quick take off and gaining balance in the water.
To perform a proper take off, you must not only consider the positioning or alignment of the board on the wave but also other crucial factors such as paddling, propulsion, lifting, foot placement, and of course, balance and posture.

When we talk about the take off, the “standing up” or also known as the Pop Up, there are various techniques and approaches. Each surfer may have their preferences and adaptations, but here we share a technique that many find effective with 8-foot beginner boards, which are basically used in our surf school in Famara, Calima Surf School, with beginner students.
Place your feet on tiptoe inside the board. This ensures that you are in the right place and not too far back, which could slow down the board and destabilize you. Keep your feet on tiptoe to use them to push yourself, not just relying on arm strength. This will give you more stability and control. Hands under the chest with thumbs on the ribs and hands straight, tucking the elbows in and arching the back with the chin up.
And of course, use the Three-Step Technique to learn to surf:
Step 1: Lift the hips to create space.
Step 2: Move the back foot laterally to knee height. This is the first reference point to ensure that the feet are in place and to find the balance between speed and control over the board.
Step 3: Move the front foot just between the hands also laterally.
Ideally, these 3 steps should be done without looking down, hence the importance of practicing the technique well on the sand before entering the water. During this process, it is important to keep the thumbs at rib height, with the elbows close to the body and the chin up for better vision and balance.
To make this technique easier to remember and practice, use a sequence of three repetitive steps. In our surfing instructions in the water, our surf instructors at Calima Surf School in Lanzarote constantly remind it.
First, practice on the sand, associating each step with a number and repeating them: “Step one, hips up; step two, back leg forward; step three, front leg between the hands.”
With enough practice, you will find that this technique becomes more natural and effective. After a few repetitions, you will notice how you feel more confident and stable when performing the take-off.
Don’t worry, in the following articles, we will detail how to learn this surf technique!
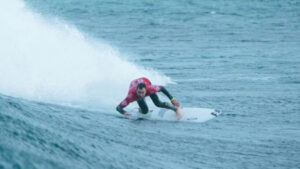
The Bottom Turn is an essential maneuver that every surfer must master. It is the first turn made after dropping down the wave and is crucial for gaining the speed and direction needed to maneuver successfully.
Once surfers begin to perfect their technique and master the initial turn, whether to the right or left, the next step is to delve into the actual maneuvers.
In these maneuvers, the main goal is to perform the turn at the highest part of the wave, as close as possible to the critical section and avoiding the foam. The bottom turn becomes the fundamental basis of each maneuver. Is it necessary to perform a bottom turn to execute a top turn? Absolutely. Without the ability to make an initial upward turn to obtain the correct angle, the bottom turn becomes that crucial first move to learn surfing.
What about the nose of the surfboard?
Basically, it points towards the shore, and depending on the type of wave you’re surfing, you can keep it lowered for more or less time. If you’re catching a wave with strength and verticality, it will allow you to drop a bit more and pivot from below without losing speed, enabling you to make a more vertical and critical turn.
If you’re on a flatter wave with less force, it’s not good to drop to the bottom where it’s flatter because then you will indeed lose your speed and won’t be able to maneuver. In this case, the bottom turn would be done a little earlier, and the idea is to do it before reaching the bottom, using the center of the wall to maintain speed.
In summary, the bottom turn marks the beginning of each maneuver, allowing the surfer to ascend to the highest part of the wave, but let’s remember that to go up, first you must go down.
“There’s no top turn without a Bottom turn.”
Here’s a demonstration from our head instructor at our Surf School in Famara.
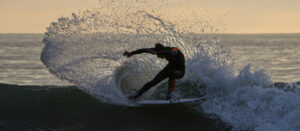
This surfing maneuver, basic yet essential, resembles drawing a figure-eight on the wave, while maintaining alignment on the wall and carving back towards the foam. It requires keeping the center of gravity low and maintaining good flexion to preserve speed. When turning back towards the wall, it’s crucial to change direction and align downwards to exit with speed.
The crucial aspect of this movement is its ability to connect the descent line with the ascent line, using the speed to skillfully reposition oneself in the active part of the wave. During the surfing learning phase, the Cut Back is one of the maneuvers that requires constant practice outside the water to reach an optimal level as a surfer.
The main objective of the Cut Back is to always stay in the critical part of the wave, where greater speed can be generated.
For example, if you find yourself aligned on the wave’s face and notice it losing strength or becoming flat, it’s time to initiate the turn back towards the foam. The key is to direct the surfboard’s nose towards the top of the foam to start the return turn accurately, ensuring to maintain a proper balance between force and speed. This will allow you to project yourself downwards and follow the wave’s path towards the face.
The Cut Back is an essential maneuver in surf lessons as it teaches you to transition between Front side and Back side turns, adjust your weight during the turn, and maintain a balance between speed and direction.
Additionally, it’s a maneuver that can be practiced out of the water with a skateboard or a surfskate, helping you perfect your movements and improve your technique before facing the waves.
Here’s a demonstration of the surfing technique in the Canary Islands.
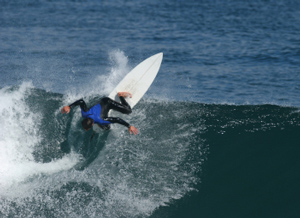
Similar to the cut back, the Reentry is a more advanced surfing maneuver that harnesses the energy of the wave from top to bottom. It involves making a 180° turn beneath the wave’s crest and then descending back down towards its base.
Upon completing the Reentry, we find ourselves in a position to perform the Take Off.
When the Reentry is executed at the top of the wave, over the lip, it’s known as “Reentry of the lip”. For a good vertical Reentry, you’ll need to execute a solid bottom turn and pivot from the bottom of the wave to ascend more vertically. The hollower and more vertical the wave, the more you can emphasize the bottom turn, and the more critical the maneuver will be without losing speed.
The key to learning this surfing technique is to ascend vertically to execute an effective Reentry and attack the critical section with precision. To achieve this, it’s crucial to execute a solid bottom turn, which involves descending enough to then ascend with the appropriate angle and verticality.
Once at the top, a 180° turn is performed to orient the board towards the shore, maintaining good flexion to conserve speed while descending.
It’s a transitional maneuver taught in surf schools and involves gliding momentarily over the foam or the lip of the wave. Typically, the surfer performs it when the wave is about to break in front of them and they want to access the next open section of the wave’s face.
Here’s a demonstration from Pablo, a surf instructor in Lanzarote.
The Tube, possibly the most iconic maneuver in global surfing, involves riding inside a wave at the precise moment when it forms into a hollow tube. This maneuver requires a wave with a tube shape, where the surfer finds the opportunity to enter its interior. The Tube is undoubtedly the favorite maneuver of many surfers. And who could blame them? There’s no comparable feeling in the world of surfing. The view from inside the tube and the adrenaline experienced are truly incomparable.
Surf maneuvers, such as wipe-outs, bottom-turns, cutbacks, and more, may seem like a complicated language at first, but once you understand each movement, taking surf lessons, and especially practicing them both in and out of the water, will help you improve your technique and fully enjoy each wave.
At Calima Surf camp Lanzarote, we’re here to guide you every step of the way with our team of instructors, led by Pablo Fernández. At our Surf School in Lanzarote, we’ll provide you with the tools and knowledge necessary to master each maneuver.
Remember, surfing is a sport of perseverance and passion. Every wipe-out, every turn, and every fall bring you closer to becoming a better surfer. Keep practicing, stay calm, and enjoy the ride.
We hope this article has been helpful! For more tips and demonstrations, follow our blog and social media channels.
Don’t miss our upcoming articles where we’ll delve deeper into each maneuver and give you more tips to improve your technique.


14 July, 2026
28 May, 2026
16 May, 2024
Comments
Leave a comment
Your e-mail address will not be published. Required fields are marked with *.